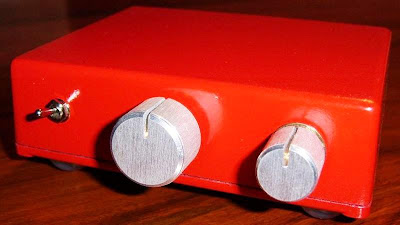
After building a OPA2134AP CMoy / Grado RA1 headphone amplifier in a timbre box, I wanted to try this high performance OP amp in a line stage / preamp. Rod Elliott's High Quality Audio Preamp (Mk II) which is a two stage preamp with balance control seemed like a good choice.
DIY PREAMP AND POWER SUPPLY
Two small pc proto boards (Radio Shack 276-159 / Dick Smith H5601) were used to accommodate all components. Metal film polypropylene capacitors were used in the signal path. It would have made the whole project easier by using physically smaller caps but for me the sound was a priority. For the power supply I used a 1.2A 18V regulated SMPS wall wart. I definitely do not need 1.2A, but I wanted a gutsy supply. Two 1k 0.5W resistors make up the "virtual ground" split supply. 220 uF low ESR capacitors and 0.1 uF decoupling capacitors are used for channel. This simple supply configuration works very well and is dead quiet.

PREAMP ENCLOSURE
The case only measures 115 X 90 X 55 mm (same size enclosure that I used for my Nanoo LM3875 Gainclone) and placing all the components in this tiny space, including a dual gang volume control and balance control was going to be tough. Unless you enjoy working in ridiculously small spaces and/or you are masochistic, build this preamp in a bigger case. Even a slightly bigger enclosure would be better. For the finish I use an acid etch primer, allowed a few days drying and then the spray color over the top. This was the same technique used with the big red caps on the Synergy Roasting Pan LM3875 Chip Amp / Gainclone.


RESULTS
I have used the preamp as a front end to my S-5 Electronics K-12 Tube Amplifier. The test setup comprised a NAD C542, modified bookshelf speakers and DIY Silver Interconnect Cables. The preamp added nothing and took away any CD player/ Valve power amp miss-match. For that reason I have named it Neutrino. The balance control has a very wide sweet spot and the volume control was non-twitchy, linear and easy to use. A very inexpensive project but it feels odd to build something that adds and removes NOTHING audibly in a cute box. Try it.
Mark Houston

Other DIY Audio Projects by Mark:

Hi,
ReplyDeletenice info and nice project.
Could you pls share BOM and schematic of preamp ?
tq
The link to the schematic is in the introduction.
ReplyDeletehttp://sound.westhost.com/project88.htm
In the ESP project page, the following is written: "... and the opamps must be bypassed using 100nF ceramic caps." Does your preamp implement this cap? I don't see where these are in any of the schematics nor do I fully understand where they should go (possibly from both positive and negative rail to ground, directly prior to the opamp?).
ReplyDeleteTommy, the 100nF caps should be placed from the chip power pins to ground, physically close to the chip pins.
ReplyDeleteSo which often microphone would you recommend alternatively for a streamer? hyperx quadcast review
ReplyDelete